The Apple Watch Series 7 is still the most advanced and best Apple smartwatch, at least, until a successor is released later in the summer. When you receive the Watch 7, the first thing you need to do is unbox and pair it with your iPhone to get the best experience. I have just received my Watch 7, and it’s my first Apple Watch. Well, I decided to see what’s like using an Apple Watch. This is a very simple guide that will show you step by step how to setup the Apple Watch Series 7 to work with a compatible iPhone.
Note that just like older Apple watches, the Watch 7 is only compatible with iOS devices. Also, note that the Apple Watch Series 7 requires iPhone 6s+ to work.
Another very important thing you should do before starting the setup process is to charge the Watch 7 to full. It takes just about an hour to fully charge it.
Ensure that you have a working Internet connection on your phone to complete this process. Your Apple Watch 7 should also be close to the iPhone.
How to Setup Apple Watch Series 7 to Work With iPhone
Before we begin, it’s important that you know that the digital crown button allows you to scroll through options and go back to a previous menu when you short-press it. While the flat side button allows you to see the most recent apps when you short-press it. If you long-press it while the watch is off it will start the device. And if you long-press it while the device is on, it will pop up the power menu option and you can easily turn it off.
So, to setup the Watch 7 to work with an iPhone, follow the steps below.
- Step 1:
- Step 2:
- Step 3:
- Step 4:
- Step 5:
- Step 6:
- Step 7:
- Step 8:
- Step 9:
- Step 10:
- Step 11:
- Step 12:
- Step 13:
- Step 14:
- Step 15:
- Step 16:
- Step 17:
- Step 18:
- Step 19:
- Step 20:
- Step 21:
- Step 22:
- Step 23:
Press and hold the side button until you see the Apple logo, then release. The device will power on and prompt you to keep the watch near your phone.
You should see the Apple Watch 7 show up on your phone, simply tap on “Continue” to start the pairing process.

Next, you have two options; Setup for Myself or Setup for a family member. Choose the one that best applies to you. In my case, I’m setting up for myself, so I will go with the first option.

In this step, you need to position the Apple Watch Series 7 into the frame to scan and connect. So hover your iPhone over the Watch 7 until it captures the display of the watch. If successfully captured, you see a message that your watch has been successfully paired with your iPhone. If you prefer to do this manually, tap on Pair manually.

Now that you have successfully paired the Apple Watch 7 to your iPhone, tap on Set up Apple Watch to continue the process.

Next, you need to choose your wrist preference. Choose left or right depending on where you will wear the Watch 7. I will continue with the Left because that’s where I will be wearing the watch.

Next, it says “connecting your Apple Watch” This will take a few seconds.

Next, you need to go through the watchOS Terms and Conditions, if you’re okay with it, tap on Agree to continue.

You will now be signed in using your Apple ID details. This will take a few seconds to complete.
Next, The system prompts you to enable route tracking for outdoor workout activities as the Watch 7 will use your location to track routes and local weather. I will go with the first option, you can also choose to disable route tracking which you can enable later from the settings app.
![]()
Next, you can enable dictation so that you can use your voice to respond to messages and perform other tasks. Click on Use dictation or the other option to continue.

The next step says Apple Watch will share settings with your iPhone for location services, find my phone and more. Click on OK to continue.

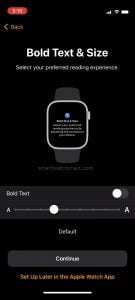
You can adjust the font size on the Watch 7. Use the easy-drag tool to adjust the font size to your preferred option. You can also do this later from the settings app. Once you are done, click on Continue to proceed with the process.
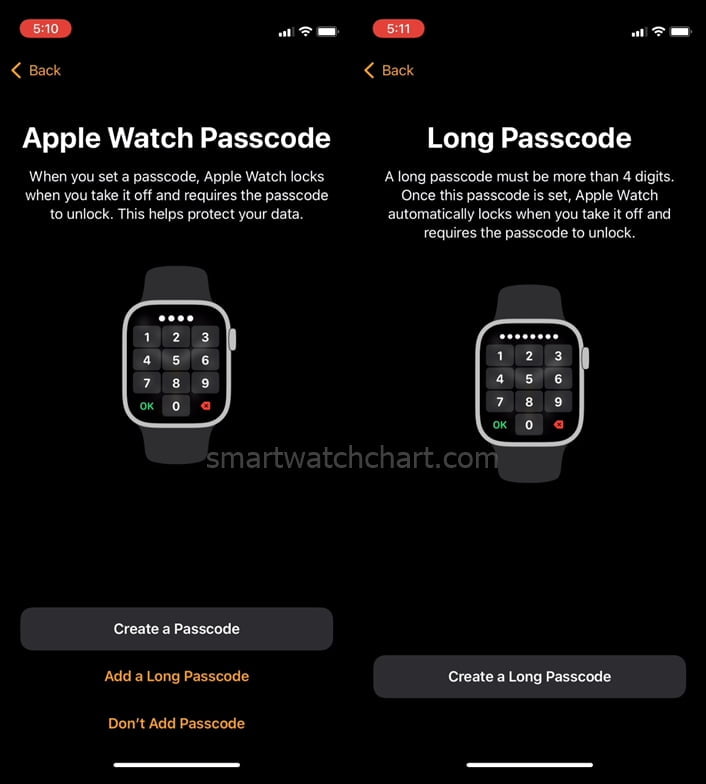
In this step, you have the option to setup a passcode for your Watch 7. You can either setup a 4-digit password or tap on Add a long passcode to setup more than 4 digits password. You can also do this later from the Settings app on the watch.
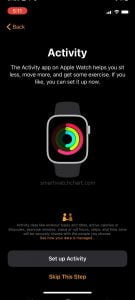
Next, you can setup the Activity ring which can help you sit less, get more exercise and move more. Tap on Setup Activity or skip this step to continue. Note that you can always setup activity later on the Apple Watch 7.
The Watch 7 has Spo2 tracking capability, you can enable this now or later. I’ll click on set up later.

Next, you have the option to automatically or manually update the Watch 7. Tap on continue to enable auto-update or tap on the next option to manually update your watch. I go with the latter option.

Next, you can enable high and low heart rate alerts. Tap on continue to proceed with the process.

In this step, you will need to enable SOS and incidental fall detection features. The SOS feature will allow the watch to make a call when you long-press the side button, while the incidental fall detection feature will allow the watch to automatically call a preset emergency contact when it detects a hard fall. Individuals who own the cellular model of the Watch 7 will be able to make calls independent of their iPhone, while the GPS model requires your phone nearby to make a call. Tap on continue to proceed.

Next, you have the option to enable always-on display mode. Don’t worry, you can easily turn this off from the quick panel section on the watch. Tap on continue to proceed.

Some apps on your iPhone have a companion app that can be installed on the Watch 7. You can choose to install them now or later. Click on your preferred option to proceed. It can take too long to install these apps, so I will do this later.

Here you can choose how you want the apps to appear, grid or list view. Grid view lets you see all the apps at a glance, then you can use the rotating crown to zoom in and out. Meanwhile, the list view allows you to scroll through the individual apps. Select your preferred option and tap on continue to proceed.

This is the final step, the Watch 7 will start syncing your phone data, and this will take about 5 to 10 minutes. Once the process is done, the watch 7 will take you to the homescreen while the phone takes you to the Apple Watch app.

Congratulations! You have successfully paired your Apple Watch Series 7 with your iPhone. Next, we’ll take a quick walk-through on how to use the Apple Watch Series 7.
How to Use Apple Watch Series 7 – Quick Walk-through
The Watch 7 has one of the simplest and most advanced UI I have ever seen. So whether you’re a beginner, you won’t have any problem using the Watch 7. Navigation is via touchscreen support, the side button and a digital rotating crown. The rotating crown will take you to a previous menu when short-pressed. Some pages on the watch will have a back-arrow that when clicked takes you back to a previous menu.
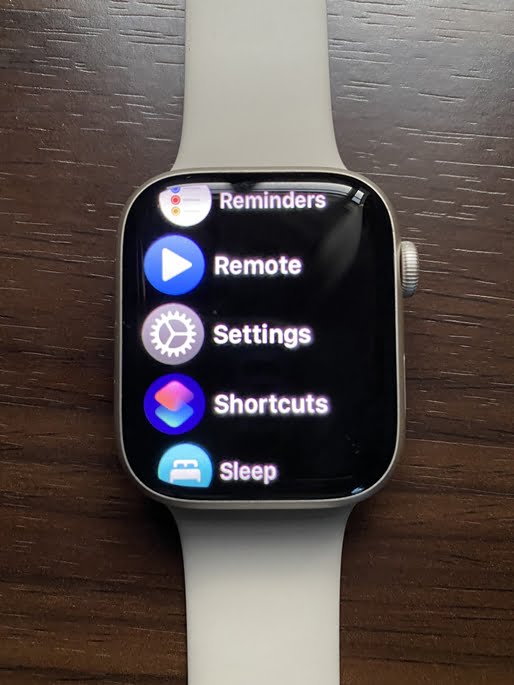
- Press the rotating crown from the homescreen to see all the apps installed on the Watch 7. You can then swipe to any app and tap to open it.
- Press the side button from anywhere on the watch to access recently used apps. You can remove any of these apps by simply swiping left and tapping on the cancel icon to remove.
- Scroll down from anywhere on the homescreen to access the notification section where you can see all messages received. Tap on a received message to respond.
- Scroll up from the homescreen to access the quick panel section which contains wifi, find my phone, battery level, alarm, airplane mode, sleep mode, torchlight, water eject mode, hearing aid and more.
- To change the watch face, tap and hold on to the homescreen to highlight the current watch face. Then swipe left and click on Add to see more watch faces. You can scroll to any watch face of your choice and then tap on Add to make it your current watch face. You can also customize a watch face by tapping on edit.
When you go to the settings app, you get to see lots of options that allow you to customize a lot of the Watch 7 features.
This is basically how to use the Apple Watch Series 7.